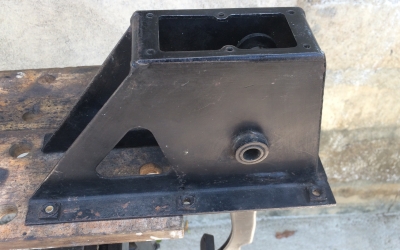
1. To Explain Clearly Im Fitting the Kit to the pedalbox but keep your pedal box on the Defender do not remove it from the bulkhead.
2. Remove the inspection lid.
3. Remove the nut from the clutch master cylinder rod.
4. Remove the 2 nuts and bolts holding the Clutch master cylinder and remove the cylinder out of the pedal box.
5. There are 2 types of pedal boxes one has the petal stop bolt on top and the other at the bottom. If you have the one on top remove the bolt totally and if you have the one at the bottom unscrew it till see next photo.
6. Unscrew it its flat you can feel it if you put your hand from the inside ( Pedal side).

7. If you have a Spring on the pedal box like this remove it please. See from the pedal side (inside of the vehicle) The spring pushes it one way or the other way so when the servo is fitted and the clutch gets lighter it cant release. So its importent that you remove the spring.
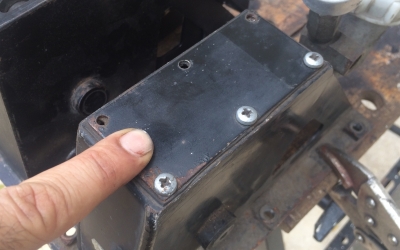
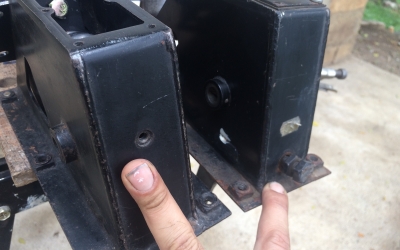
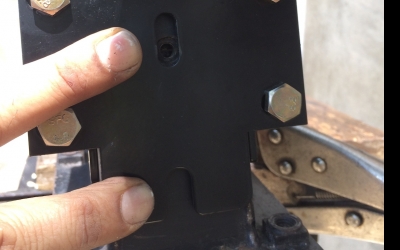
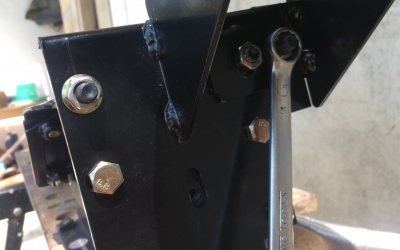
8. Main bracket holder wih rubber, Put it in from the inspection hole.
11. Fit the Main bolt on to the pedal box and tighten the 2 bolts.
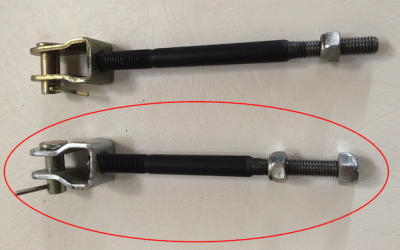
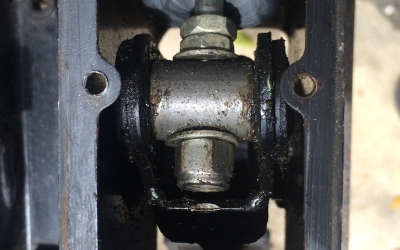
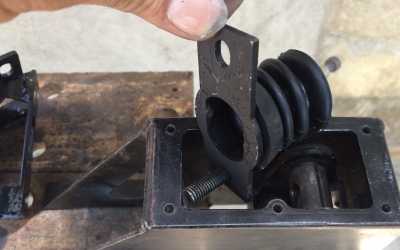
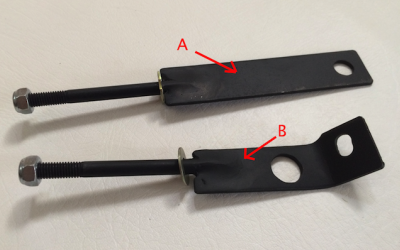
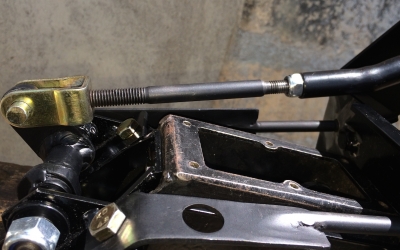
12. There are 2 diverter rods ake the shorter rod and remove the end lock nut and send it through the main bracket and through the rubber boot, through the pedal and use the lock nut to tighten. see the next photo.
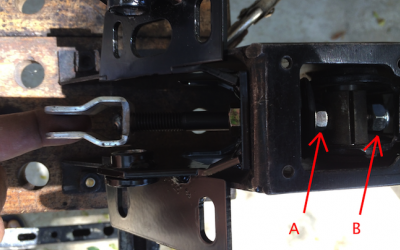
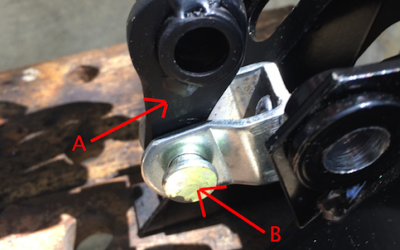
13. Make sure you have send the second lock nut through the rubber boot also,(marked A) tighten the lock nut marked B. Then when you move the pedal up and down the rod shold move.
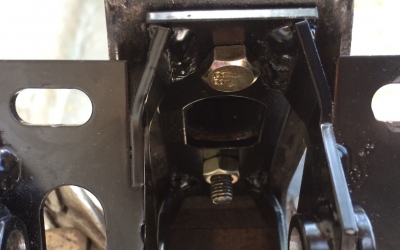
14. Like the photos fit the diverter to the Shorter rod and send the pin like the photo through and then lock it with the split pin on the other side on the pin.
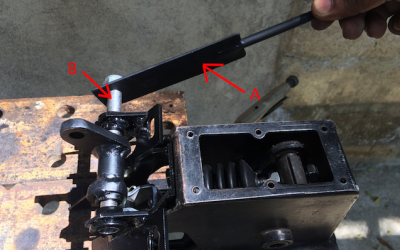
15. Next Send the main Bolt B through the long bracket marked A ( see the next photo) then through main bracket hole also through the diverter like the photo.
16. Long Brackets A and B.
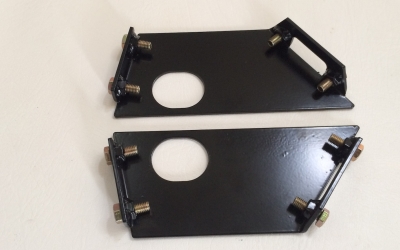
17. Side Brackets.
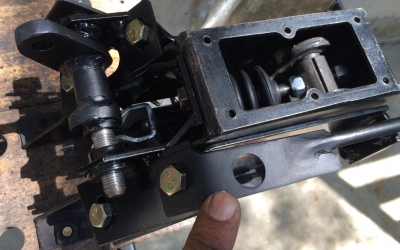
18. Fit the Side Brackets to the main bracket also same time fit the long bracket B to the top bolt like the photo.but do not tighten the 4 bolts yet.
19. Front view after the side braket are fitted.
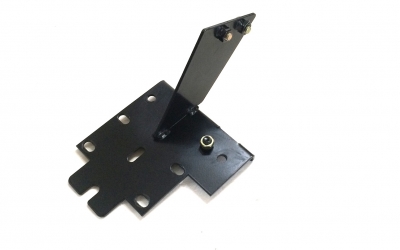
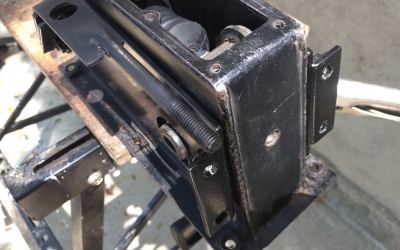
20. Front bracket.

21.Fit the front bracket to the front of the side brackets and make sure the long brackets A and B go through the 2 holes.
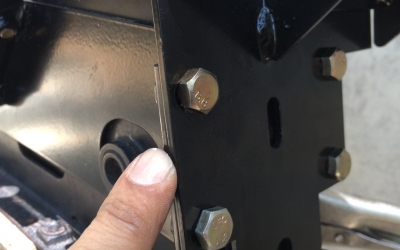
22. Before tightening the 4 bolts on the front bracket make sure you press the side brackets towards each other then tighten it, also you to the same for the back 4 bolts (press the side brackets in then tighten them).
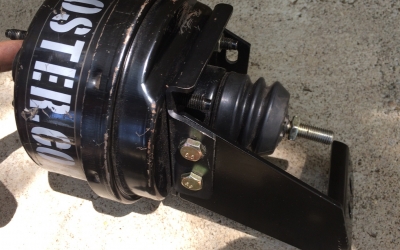
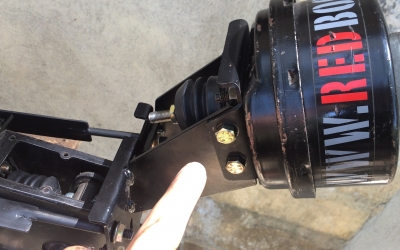
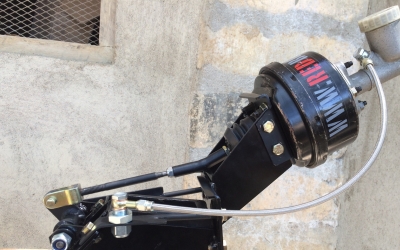
23. Fit the servo to the servo bracket like the photo make sure the line is the same then tighten the 2 bolts. Sending the servo unders the wing is not easy.
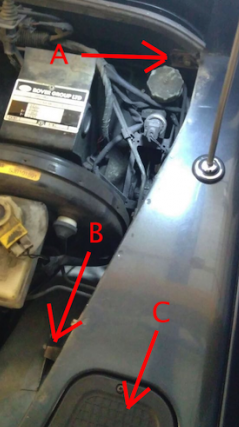
24. (A) remove the bolt of the wing to bulkhead
(B) remove the wing bracket
(C) Remove the inspection cover on the wing.
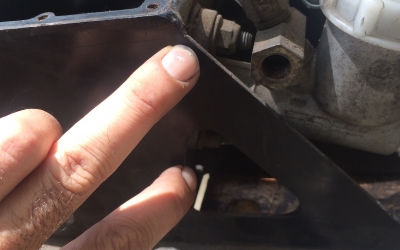
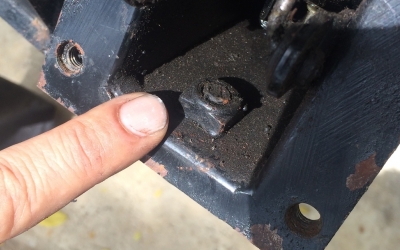
25. Fit the pedal stop bolts but dont send the bolt in to much just enough to get some thread ( dont let it come out from the other side we need the pedal to have a full travel) then tighten the nut so that the front bracket locks to the centre.
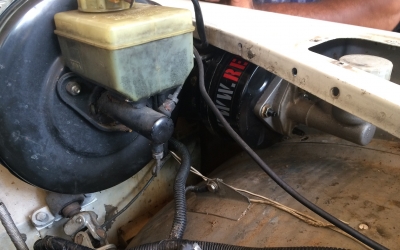
26. To Send he Servo into the wing you need to pull the wing up a little and push the servo in. sometimes you may have to remove the brack master cylinder from the Servo, If you have to do this take the vacuum out of brake servo by pressing the brake pedal few times. Then take the pump out slowly there is a rubber o-ring inside so slowly.
27. Once inside this is the position.
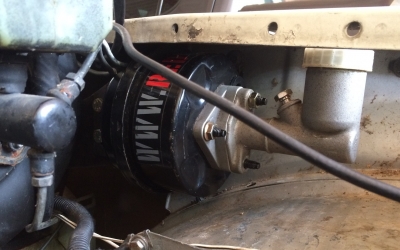
28. Fit and tighten the 2 bolts on the back of the servo.
29. Tighten the 3 top bolts on the front bracket like on the photo.

30. Fit the servo shaft to the back of the servo keep 2 - 3 treads (rounds) from the back like the photo.
31. Fit the longer rod into the shaft and the other end to the diverter and send the pin through and the lock it with the split pin. The lenth is set to the pedal to be the same hight as the brake pedal. here bu sending the rod in to the shaft youy can change the possition of the height of the pedal, but keep this heaght as its set to be average height if possible.but if there is a spring on the pedal like some do it will always be at the top possition.

32. Puma Td5 Oil line
33. 300tdi, 200 tdi and others.

34. fit the nut to the end of the main bolt the tighten it a little so that the bolt want come loose it need to turn freely.then also the inspection lid.